

I've had these Euro coins for years (found them all under the seat of my old GMC Jimmy when I bought it). Since it's not worth cashing them in at the airport because of their fees I saved them for something crafty. Today was the day to break them out and put them to good use.

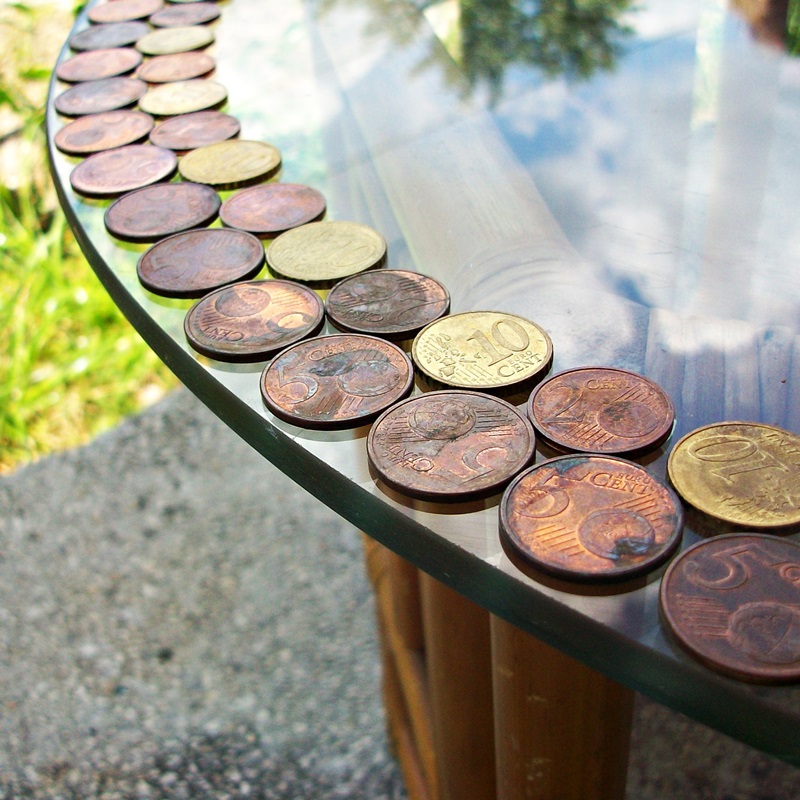
I started with the copper coins around the outer edge. I couldn't glue them right up to the edge because there was a gap at the end of the circle, so they're about 4mm from the edge so that all the coins are butt up against each other.

I used my E6000 glue that I got at JoAnn Fabrics for jewelry making. It dries clear and holds better than super glue in my opinion.

The music I had blaring on my cell phone woke my youngest sister Jennifer up, so she and my niece, Gemma, came outside and kept me company. Isn't Gemma the cutest little girl ever! This is her "cheese" face. They live next door to me in a secluded duplex. We actually share a porch, so this outside table was for them, too!

Gemma is such a ham in front of the camera. Jennifer took some photos of her while I was crafting.


After the first row of copper tone coins were glued down I began to place more copper and some gold tone coins down for a second row to give the table more color and unique-ness. I had 50, 20, 10, 5, 2, and 1 cent pieces to choose from. The outside ended up being one full round of 5's with an inner circle of 10's and 2's because they fit together the best.

Meanwhile on the other side of the porch... I guess I inspired more creativity! Gemma wanted to keep playing with the coins as they dried on the table so my sister gave her some paint, paint brushes, and an empty box to have fun with. Her creativity spilled over onto the concrete slab that is our porch, so now we can remember today forever!

Once I had the outer edge of the glass top table covered with coins I moved onto the middle of the table. I wanted to make another smaller circle, but I wanted to layer the coins to create more depth.
I used the 20 pieces because they were larger with unique edges. Besides, I only had one of the 50 cent pieces. (It took me a while to center that circle of coins on the table. My sister still doesn't think it's center. I think she's silly.)


Here's the table all complete:

I made sure the inner circle of coins was large enough for our community ash tray and tall enough to keep it in place. You could also put a small vase with some flowers there. No matter what you use there, the depth those coins add to the table is awesome.

I love how this table looks on our porch. Now all we need are new chairs (and more of them so it doesn't become standing room only). These old chairs have seen better days. Do you like the cartoon stickers my niece put on them? She was trying to dress them up for me.

(Jennifer and Gemma live on the left, and I am in the apartment on the right with my boyfriend, Will.)
I think you are silly too!
ReplyDeleteOmg...how cute!! :-) you're so talented!
ReplyDeleteYour niece is ADORABLE!!!
ReplyDeleteThat is totally awesome! I love how it turned out, what a great idea!
ReplyDeleteThanks a bunch ladies! I'm about to go outside and enjoy that table right now :)
ReplyDelete